Posts

Showing posts with the label sewing

Meriam Trousers

Image
Trousers that fit! The Pattern I am using the Meriam Trouser pattern from Cashmerette. As is typical with their patterns, it is excellent. The pant leg is balanced properly at the knee, and all the pieces match up nicely. The instructions are very good, the welt pocket and fly particularly. And they even provide a "full bum" back piece, which is a godsend for some one shaped like me. All in all, highly recommend.  Fitting I used the Top-Down-Center-Out method for fitting, and had good luck with it. Though I did end up with a waist too big for the waist band, that was very much a me issue. I somehow managed to skip the basting step in the top down center out method, so I didn't get everything quite right with my new waistline. I'll go back and baste it, and pin trace the seams to make sure I got it right. I ended up decreasing the rise by 1" at the back and 3" at the front - this sets the waistband fairly low, around the top of my hip bones. This tends to be ...
Top Down Center Out - Pants

Image
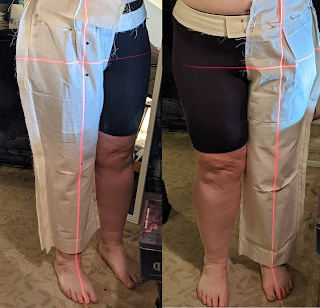
 The next thing on my list of garments that are hard to buy for my body is pants! I have a lot of butt, and a fair amount of thigh, and proportionally a much smaller waist. In a front view I'm reasonably straight up and down, most of the difference between waist and hip is "Z" dimension (where X and Y are horizontal and vertical).  I am starting with the Meriam Trouser pattern from Cashmerette. On first inspection, it appears to be a very well drafted pattern. The center grain line is balanced at the knee on the front and the back, and the seam lines match up. I measured 40" at the actual waistband location (around my hips rather than my natural waist) and 48" hip. This puts me right at the size 18. I used the full butt option, since I know I'll need it.  I am fitting them using the Top Down Center Out method by Ruth Collins, @ithacamaven on instagram (and described by The Crooked Hem on youtube - her how too guides were super helpful). It basically has yo...

Bras Bras Bras

Image
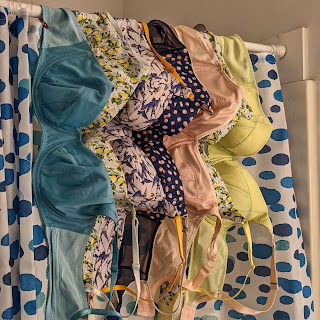
Bras! My creations since August One of the hardest things to purchase off the rack (at least for me) is bras. I recently re-measured and tried to order some using the r/abrathatfits subreddit instructions, and aquired one whole bra that mostly works for me, at the (dicounted) price of $60. I decided that enough was enough and it was time to go back to bra making. I did make several bras years ago, using the Pin Up Girls Shelley pattern and the Boylston bra from Orange Lingerie. Both required a fair amount of modifications to work for my shape. It turns out the bra making world has changed fairly significantly in the intervening 6 years. I ended up using the Labellum bra from LilyPaDesigns, on the grounds that it's shaped similarly to the Shelley, and is drafted for a fair amount of projection. I used the fitting instructions from Sew Busty for sewing a fitting band and getting the cups corrected for my shape. I ordered some dissolvable thread, which is pretty great for test fitt...

Auburn Blazer - Muslin 2

Image
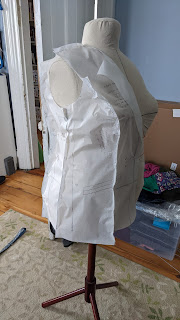
 This is really more of a test garment than a muslin - I made a fully interfaced and lined jacket, with pockets, shoulder pads, and sleeve heads. I also put in a bound button hole for practice. It's actually reasonably wearable, except for the fact that it's white and all my winter clothes are dark. But I could see wearing it over a summer dress. I got through cutting everything out and fusing the interfacing bay in May, and then stalled out until practically Thanksgiving.  And then when I went to put everything together my sewing machine needed work - apparently all the internal grease had seized and needed to be cleaned out. I ended up taking it to my local sewing shop (Pintuck and Purl in North Hampton NH) and they were able to service it. And they sold me a Bernette - the 35, which is the more advanced mechanical version. I was able to put everything together with it, and pick up my Pfaff a few weeks later as good as new.  All of the changes from my original muslin ca...

Black Ribbed Saybrook

Image
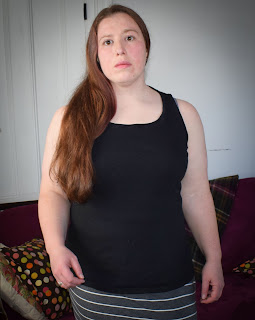
 I made another tank! This one a straight size 16 C/D I like it a lot, though I think I should definitely do a swayback before I make another one. It's more noticeable that the back is longer than it should be here. I tried to use wondertape for the neckline with this version, with mixed success. It's supposed to wash out, but the edge is still a little funky. Maybe after a few washes it will be better. Other than that it's a pretty successful project.  Front view, black saybrook tank I did muck about with the cashmerette size selector, and it looks like it's suggesting a 14 G/H graded out to an 18 waist and 16 hip. Which is interesting - I would not have thought that the 14 would be the correct size, especially at the G/H bust. I might give it a try next time (with the sway back adjustment!) Back view of saybrook tank, with fabric pooling at the small of the back

Auburn Blazer Muslin 1 - Fitting Tweaks

Image
 I went through and sewed the seams I had previously pinned, and it became clear that the original 1" swayback was not enough. The center back vent was still swinging open, which is pretty typical of too much length there. So I sewed out about a 1/2" seam across the center waist line, tapering to nothing on each end. Honestly I'm not sure why I ever though 1" was going to be enough - I almost always need a 2" swayback adjustment, but live and learn.  Back view of the blazer muslin, with wrinkles at the back and the vent opening After finalizing the changes, I went through and traced them all onto the pattern pieces and traced them out. I then went through and cut some cheap fabric for muslin #2, my test garment. This version will be pretty close to complete, basically everything I want to do to the final version I'll do with it, including pockets and lining. The construction is different enough from the Jasika that I want a full test before cutting into the ...

Operation Auburn Blazer

Image
 Cashmerette recently released the Auburn Blazer, a tailored jacket with princess seams and welt pockets, and clearly I needed to make one. I adjusted everything to fit on three sheets of Arch E paper (36x48) and swung by the office to plot it out. Then I traced the body pieces onto medical paper and pinned it to my dress form Hazel.  Pattern pieces pinned together on my dressform Back view with 1/2" horizontal tuck at center back Side view with no tuck - back hem is lower than front The front princess seams is a little wonky, but I think part of that is trying to pin two opposing curves in paper. Also Hazel doesn't have exactly the same bust shape that I do. I'll have to review that area in the actual muslin.  The back is a little bit long right off the bat - I took a 1/2" fold at center back and it lies much better. This is not surprising - Cashmerette patterns have some swayback built in, but my body has a lot, so having to make a 1" swayback adjustment doesn...

Blazer of Glory part 4

Image
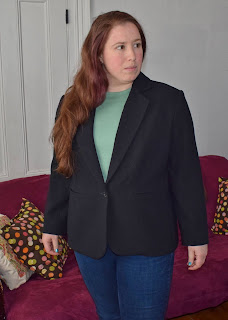
It's done!  Final completed blazer I spent most of the month of January working on this, cutting and interfacing and sewing. I did the cutting out in sections, starting with the interfacing and then the main fabric. I waited to cut the lining until I was ready to sew it, following the advice of another sewer who suggested that since there is so much cutting for this project it's helpful to not do it all at the same time. That did work well for me - there is a huge number of pieces to cut out and keep track of. I traced the pieces onto the fabric, pinning the layers together inside the lines to ensure the two sides were the same. Pattern weights were a combination of mason jar pickling weights and a couple of cans.  Cutting out the interfacing with pattern weights and red chalk Cutting out the main fabric - pinning the fabric layers together and more tracing Jacket torso put together on the dress form, with the lapels clipped open to help shape the roll line The sewing process ...

Blazer of Glory Part 2

Image
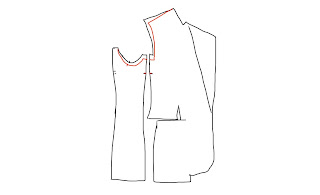
 Muslin take 2!  This time, I adjusted the front and side pieces for a 1/2" shoulder slope and a 1/2" forward shoulder adjustment, combined into a 1" change to the front piece only. Because I don't want to change the armscye, the shoulder change needs to continue down into the underarm area, to keep the length the same and make sure the sleeve still fits. I used the pivot and slide technique here too, to make sure the length didn't change. Then matching the notches on the modified front and side panels allowed me to transfer over the change, and pivot back to the back edge.  Sketch of the adjusted front and side pattern pieces I recut the body pieces, with the shoulder adjustment and staying with the size 18 for the full size. I pulled the sleeves and collar off the original muslin and put them into the new one. Getting pretty close to being ready for the real thing! Blazer - size 18, front and back views The sleeves are definitely too long, but I'm not sure ...

Blazer of Glory! Part 1

Image
 My dreams of making a blazer that actually fits me are inching towards reality. I started with the Jasika pattern from Closet Core patterns. I knew that I was going to need to make a full bicep adjustment, since my arm measures 16" and the finished garment size is 15.75". I added 2" to get a reasonable amount of ease. I also followed the advice the ever helpful Carol Kimball on Ravelry to pin the flat pattern pieces together to check the fit. This made it obvious that the back was going to be too long and I needed to do a sway back adjustment. Pinning out the lower back made it sit much better.  Initial paper pattern fitting on my dress form I adjusted the back pieces for length, using the pivot and slide technique suggested here. I shortened the center back by 1 1/2" (since the fold I pinned out was 3/4") and tried it on the dress form. Making the initial pattern adjustments to the paper patter made the back fit better, but there is clearly a shoulder slope...

Wahid Waistcoat

Image
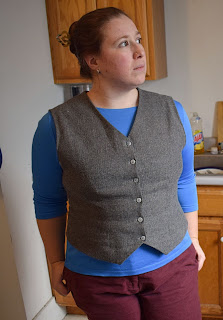
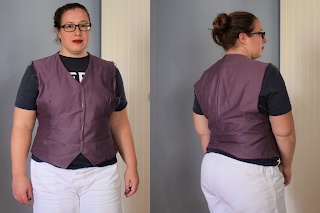
 I completed the thing! I'm pretty thrilled with it. All the fitting modifications I made worked quite well, and it fits great. I think it's going to prove a pretty useful garment for what I wanted - an extra layer over a nice t-shirt, a little bit dressier than the Ibex vest I wear a lot these days.  Front view finished I only barely had enough fabric - I had to piece the inside facing, and I skipped the pockets because I didn't have enough to make the welts. I'm a little bummed about the lack of pockets, but I'll know for next time. And it saved me having to figure out where to put them! I followed the instructions pretty exactly, with the only exception of the lining insertion. The instructions say to sew the lining to the main vest along the front and bottom, and leave 15 cm at the back open. But because the armholes are hand sewn you can turn the vest to the right side through the armhole and do the entire rest in one pass. Hand sewing the armholes wasn't t...

Saybrook Tank

Image
 This was a kind of spur of the moment project, but I'm super pleased with it. I bought the pattern when Cashmerette came out with it, and picked up the fabric when I was buying fabric for the Lenox dress. I made a straight size 18, which for this worked well. It's nicely skimming everywhere. I could probably get away with a 16 for a closer fit, but the 18 is good for a substantial knit like the one I used. I did the view A neckline but the flat hem from view B for coverage. I could have done a little extra swayback adjustment (the cashmerette pattern have some swayback drafted in), but I don't know that I really care that there's some fabric pooling at the small of my back.  Front view of tank I haven't done a ton of sewing with knits, and I'm pleased with how smoothly this one went. I used the recommended .5x2.5 zigzag for the seams, and then a wider zigzag in the seam allowance to prevent fraying. The neckline and armhole binding was attached with the same n...

Wahid Waistcoat Fitting

Image
A while back I decided that it might be fun to add a waistcoat/vest type garment to my wardrobe. Something to wear over a long sleeve t-shirt to dress up and add warmth for work. It turned out to be a bit of a fitting journey, since the pattern I started with (from freesewing.org ) was drafted for a masculine figure. There are a couple of adjustments I needed to make to get it to fit me correctly (slight understatement).  Freesewing.org is a pretty excellent resource, with several different patterns all drafted to your measurements. They have patterns drafted for figures with breasts and without, though not every pattern is available for every body. There are some limitations, a design that's been drafted for a masculine figure may not do so well on a body with breasts, and there are some combinations of measurements that will cause the generator to fail. I ran into that with a basic body block - when I put in my actual chest and arm measurements it threw an error code. I think th...