Auburn Blazer Muslin 1 - Fitting Tweaks
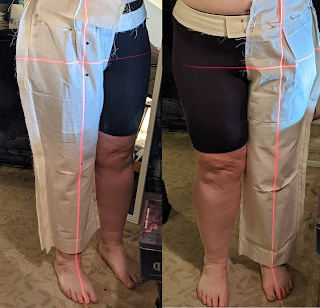
I went through and sewed the seams I had previously pinned, and it became clear that the original 1" swayback was not enough. The center back vent was still swinging open, which is pretty typical of too much length there. So I sewed out about a 1/2" seam across the center waist line, tapering to nothing on each end. Honestly I'm not sure why I ever though 1" was going to be enough - I almost always need a 2" swayback adjustment, but live and learn.
 |
| Back view of the blazer muslin, with wrinkles at the back and the vent opening |
After finalizing the changes, I went through and traced them all onto the pattern pieces and traced them out. I then went through and cut some cheap fabric for muslin #2, my test garment. This version will be pretty close to complete, basically everything I want to do to the final version I'll do with it, including pockets and lining. The construction is different enough from the Jasika that I want a full test before cutting into the (expensive) kit fabric, and there are some things from the Jasika that I know I want to use (like sewing the facing to the body and setting the turn of the cloth at the lapel and the roll line before bagging the lining).
 |
| Back view of blazer with additional waist seam - much smoother |
All in all, my adjustments were:
- 2" swayback adjustment
- 1/4" shoulder slope (applied to the front and back pieces)
- 1/4" upper back reduction
- 1/2" back side seam reduction

Comments
Post a Comment