Posts

Auburn Blazer Muslin #1
Image
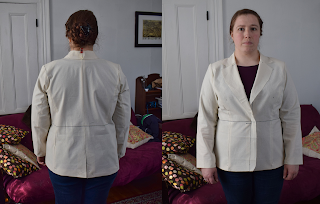
 I have started the fitting process for the Auburn Blazer - it's looking pretty good! I fit my paper pattern and made a 1" swayback adjustment (at the back neck per the Nancy Zieman method), but otherwise cut it as drafted. It looks pretty good!  Original muslin front and back views I pinned out about 1/4" at the shoulders to adjust the slope, which does seem to help the diagonal wrinkles under the armscyes. But there's still a bit of extra fullness across the center back.  Front and back views of the muslin with the shoulders pinned up Finally I pinned out the center back and princess seams just a bit, to take care of the extra fullness below the shoulders. the center back seam at the armhole level, and the princess seams at the waist. I'll have to sew those seams and see if I still have adequate range of motion.  Back view of final altered muslin
Operation Auburn Blazer

Image
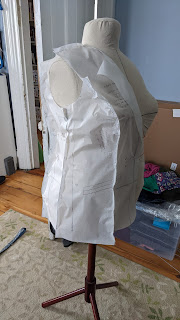
 Cashmerette recently released the Auburn Blazer, a tailored jacket with princess seams and welt pockets, and clearly I needed to make one. I adjusted everything to fit on three sheets of Arch E paper (36x48) and swung by the office to plot it out. Then I traced the body pieces onto medical paper and pinned it to my dress form Hazel.  Pattern pieces pinned together on my dressform Back view with 1/2" horizontal tuck at center back Side view with no tuck - back hem is lower than front The front princess seams is a little wonky, but I think part of that is trying to pin two opposing curves in paper. Also Hazel doesn't have exactly the same bust shape that I do. I'll have to review that area in the actual muslin.  The back is a little bit long right off the bat - I took a 1/2" fold at center back and it lies much better. This is not surprising - Cashmerette patterns have some swayback built in, but my body has a lot, so having to make a 1" swayback adjustment doesn...

Deco Hue Shift Afghan

 I've got a new knitting project! It's a Hue Shift Afghan from a kit from Knit Picks, in the Deco colorway which is a neutral color pallet. I'm pretty excited about it - this is a pattern I've been eyeing for literal years and I'm finally excited to take it on.  Pattern: Hue Shift Afghan Yarn:  Brava Sport Needle: Size 5 addi turbo I'm following the pattern pretty much as written, though I did switch the center stitch to purl on the wrong side so there's a little knit stitch column on the centered double decrease. I'm also slipping the first stitch of every row to make picking up easier. On the left side that's a simple slip one with yarn in front and then knit, on the right I settled on purling the last stitch and then slipping the first knitwise with the yarn in back, and then starting the second color. That keeps the end with the color change neat.  There are reports that the kits don't really have quite enough yarn to actually complete the pr...

Blazer of Glory part 4

Image
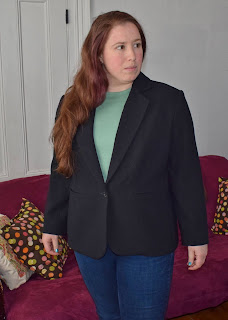
It's done!  Final completed blazer I spent most of the month of January working on this, cutting and interfacing and sewing. I did the cutting out in sections, starting with the interfacing and then the main fabric. I waited to cut the lining until I was ready to sew it, following the advice of another sewer who suggested that since there is so much cutting for this project it's helpful to not do it all at the same time. That did work well for me - there is a huge number of pieces to cut out and keep track of. I traced the pieces onto the fabric, pinning the layers together inside the lines to ensure the two sides were the same. Pattern weights were a combination of mason jar pickling weights and a couple of cans.  Cutting out the interfacing with pattern weights and red chalk Cutting out the main fabric - pinning the fabric layers together and more tracing Jacket torso put together on the dress form, with the lapels clipped open to help shape the roll line The sewing process ...

Blazer of Glory part 3

Image
 Having achieved a successful muslin, the next step is tracing off all of the pattern pieces and making sure that the alterations I made to the main pieces are transferred to the lining and interfacing pieces as well. This is a bit tricky, since there are a lot of pieces and they don't always follow the exterior pieces completely. Particularly since I did the swayback adjustment up at the top of the pattern not at the center back there will be some intersection between back lining and back facing to contend with.  Helpfully, the blazer fitting book Closet Core has available lists all the pieces, and suggests that you mark up what will need to be changed. This is what mine looks like, with the approximate line of the changes. I'll check each piece off as I trace it, so I know I have all the required pieces traced. Pattern pieces showing red marks for required adjustments The one thing that I have changed from the last muslin is the shoulder slope/forward shoulder adjustment. I ...

Blazer of Glory Part 2

Image
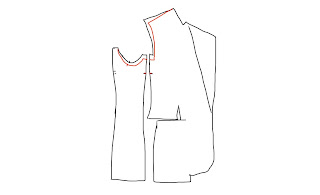
 Muslin take 2!  This time, I adjusted the front and side pieces for a 1/2" shoulder slope and a 1/2" forward shoulder adjustment, combined into a 1" change to the front piece only. Because I don't want to change the armscye, the shoulder change needs to continue down into the underarm area, to keep the length the same and make sure the sleeve still fits. I used the pivot and slide technique here too, to make sure the length didn't change. Then matching the notches on the modified front and side panels allowed me to transfer over the change, and pivot back to the back edge.  Sketch of the adjusted front and side pattern pieces I recut the body pieces, with the shoulder adjustment and staying with the size 18 for the full size. I pulled the sleeves and collar off the original muslin and put them into the new one. Getting pretty close to being ready for the real thing! Blazer - size 18, front and back views The sleeves are definitely too long, but I'm not sure ...

Blazer of Glory! Part 1

Image
 My dreams of making a blazer that actually fits me are inching towards reality. I started with the Jasika pattern from Closet Core patterns. I knew that I was going to need to make a full bicep adjustment, since my arm measures 16" and the finished garment size is 15.75". I added 2" to get a reasonable amount of ease. I also followed the advice the ever helpful Carol Kimball on Ravelry to pin the flat pattern pieces together to check the fit. This made it obvious that the back was going to be too long and I needed to do a sway back adjustment. Pinning out the lower back made it sit much better.  Initial paper pattern fitting on my dress form I adjusted the back pieces for length, using the pivot and slide technique suggested here. I shortened the center back by 1 1/2" (since the fold I pinned out was 3/4") and tried it on the dress form. Making the initial pattern adjustments to the paper patter made the back fit better, but there is clearly a shoulder slope...